Hi everyone, Back with me Ragil! In this tutorial, I’ll show you step-by-step how to build a professional website from scratch using Zoho Sites. In today’s digital age, having a website is like having a modern-day storefront or business card, it’s essential for boosting your business’s credibility. The good news is that you no longer have to worry about learning complex programming languages.
Drag-and-drop platforms like Zoho Sites are designed specifically for content creators, freelancers, and business owners. You don’t need any coding skills or design experience whatsoever. By the end of this article, you’ll have a website ready to go live, complete with organized navigation and contact forms, and even integrated with marketing tools. Let’s get started!
Sign Up and Select a Template
The first step, of course, is to create an account. The registration process is quick and easy. You can create an account using a standard email and password combination, or for greater convenience, simply sign in using your Google account.
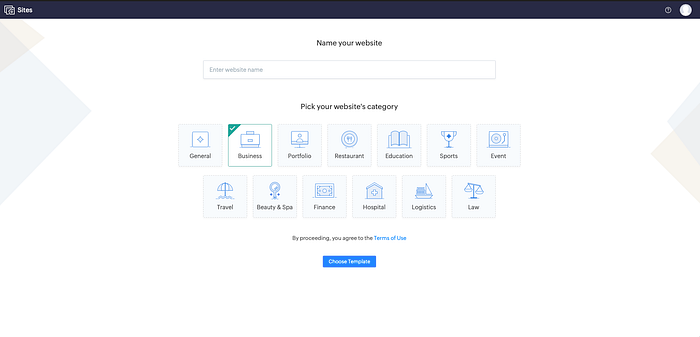
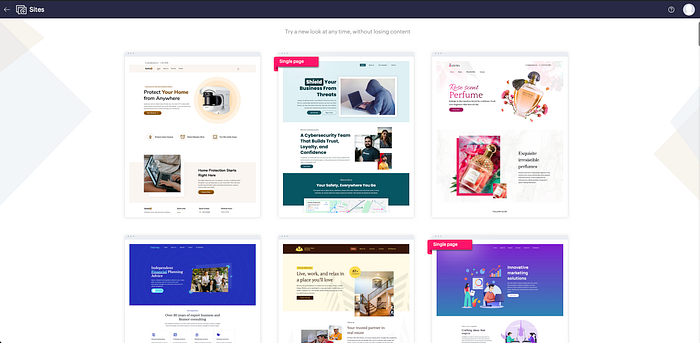
Once you’ve accessed the dashboard, click “Create New Website.” Here, Zoho Sites offers dozens of impressive design templates categorized by industry , ranging from art portfolios, blogs, and company profiles to online stores.
Don’t rush your choice! The template you select will determine your website’s layout. Hover your cursor over a template that catches your eye and click “Live Demo.” Check if the overall feel is right, the colors suit your taste, and the navigation looks good. Once you’re happy with it, simply click “Customize” to start editing.
Configure Colors, Fonts, and Header Appearance
Before moving on to more detailed design, Zoho Sites will ask you to set up four basic elements to ensure your website has a strong identity:
- Colors
Zoho offers four built-in color palettes that are guaranteed to look great. Just pick the one you think looks the coolest, and the colors of your buttons, links, and other elements will automatically adjust to match. - Font
Choose a font style that matches the vibe of your website. Do you want something formal, creative or relaxed? All you have to do is click. - Header
This is the top section of your website where the menu is located. You can choose to place the logo in the center or on the left, or opt for a split menu style with elements on both the left and right. - Banner
Configure the display style for the welcome image on your main page.
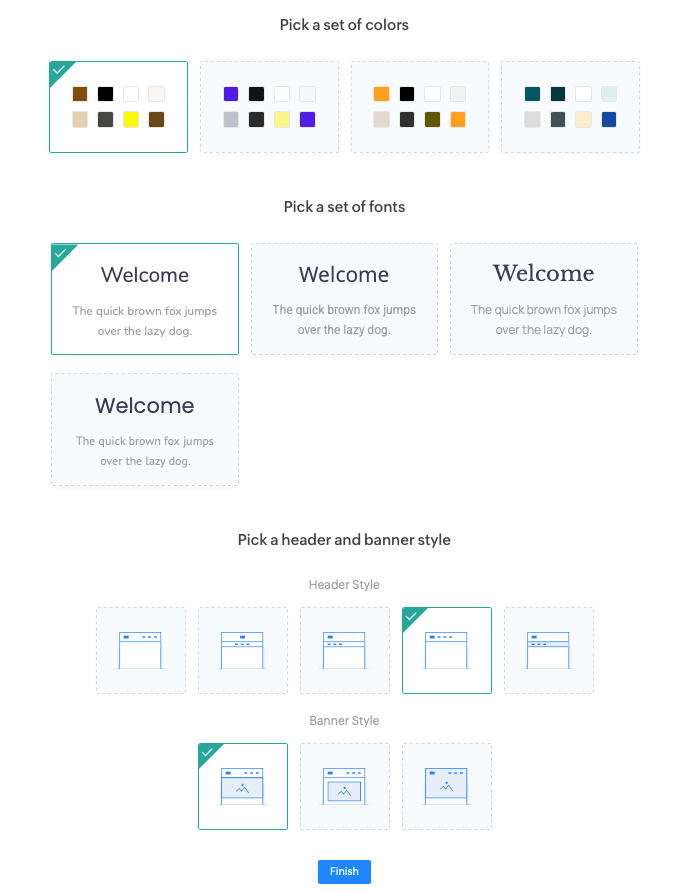
Once everything has been selected, click “Done” and let’s head to the actual editing page!
A Peek at the Dashboard: Monitor Your Website Visitors
After a brief loading period, you’ll enter the Dashboard (Site Builder Interface). This dashboard isn’t just for editing; it’s also a command center for monitoring your website’s performance in real-time.
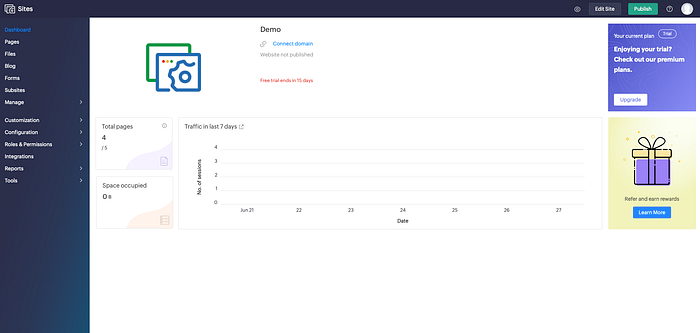
Here, you can view a graph showing how many people have visited your website over the past seven days. To get even more robust and detailed data, you can also connect your site to Google Analytics. Additionally, you can monitor your remaining storage capacity and the number of pages you’ve created to avoid exceeding limits.
On the left side of the dashboard, there is a menu for managing Pages, the Blog, and Settings. If you want to edit the visual layout directly, simply click the “Edit Site” button.
Create a Page and Get It to Appear on Google
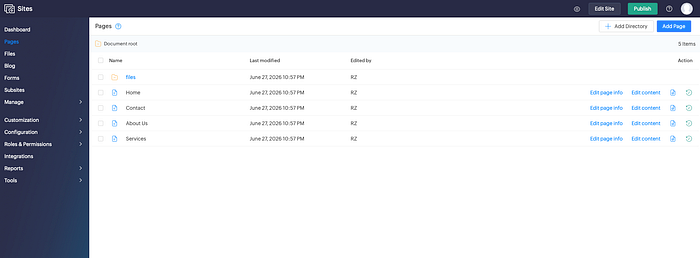
A website certainly needs pages, right? Well, you can manage all your pages via the “Pages” menu located in the left sidebar.
Templates usually come with standard pages like Home, About, and Contact. If you need an additional page (such as “Services”), simply click “Add Page” in the top-right corner. The system will automatically generate a URL (like /services), but you are free to change the name to something that fits better.
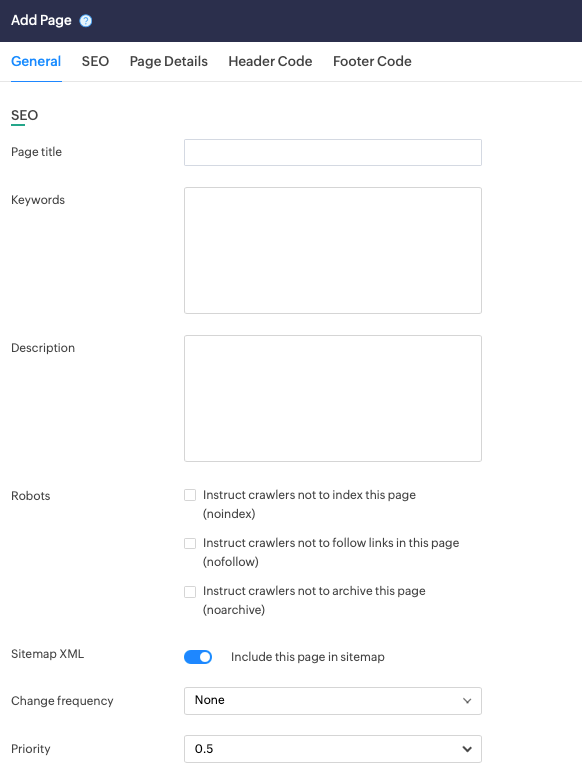
One crucial thing is SEO (Search Engine Optimization). This is what makes your website easy to find on Google. When creating a page, make sure to fill in:
- SEO Title (Meta Title): Create an engaging title, for example: “Professional Web Development by Ragil Zakaria”.
- Description (Meta Description): Write a brief summary of around 150 characters that sparks curiosity and encourages people to click.
- Keywords: Enter keywords related to your business.
Once your website grows to hundreds of pages, don’t let things get cluttered. Use the “Add Directory” feature to group those pages into a virtual folder and keep everything organized.
Adding Blogs, Forms, and Multilingual Websites
To ensure your website visitors don’t just drop by and leave, we need to make the website interactive.
You can start writing articles, tips, or news related to your business via the “Blog” menu. You can schedule posts, add tags, and even enable the comments section to allow visitor interaction. The more people read your blog, the better it is for your website’s performance!
Collect data using forms
If you need customer data like names, emails, or phone numbers, simply add “Forms.” Even better, the data collected via these forms automatically integrates with the Zoho CRM system, making follow-ups incredibly easy.
Sub-site
Targeting an international market? No problem, Zoho Sites offers a “Subsite” feature that lets you create versions of your website in other languages (even supporting right-to-left scripts like Arabic) without having to build a new website project from scratch.
Design Freely with the Visual Editor
Here comes the fun part! Click the “Visual Editor” button and let’s get creative. Here, you’ll see the results of every change you make instantly.
If you suddenly feel the initial color theme isn’t quite right, you can change it immediately in the Presets menu. Once you switch to dark mode or a different color palette, all the text and button colors on the website will automatically adjust.
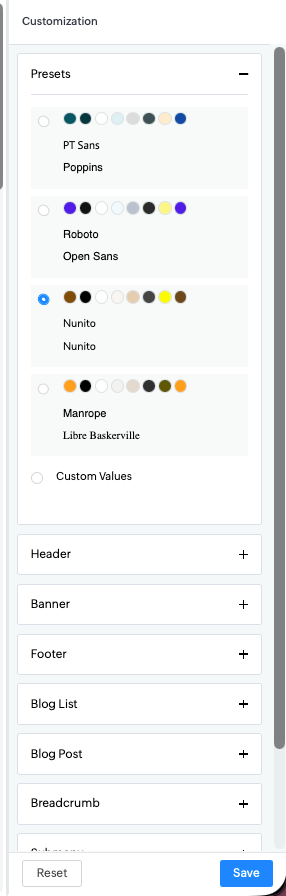
You can experiment with the header menu at the top. Do you want it to stay fixed at the top when scrolling down? Or perhaps make it transparent so the background image really stands out? It’s all customizable. Don’t forget to add your social media icons to the corner of the menu so visitors can easily follow your accounts.
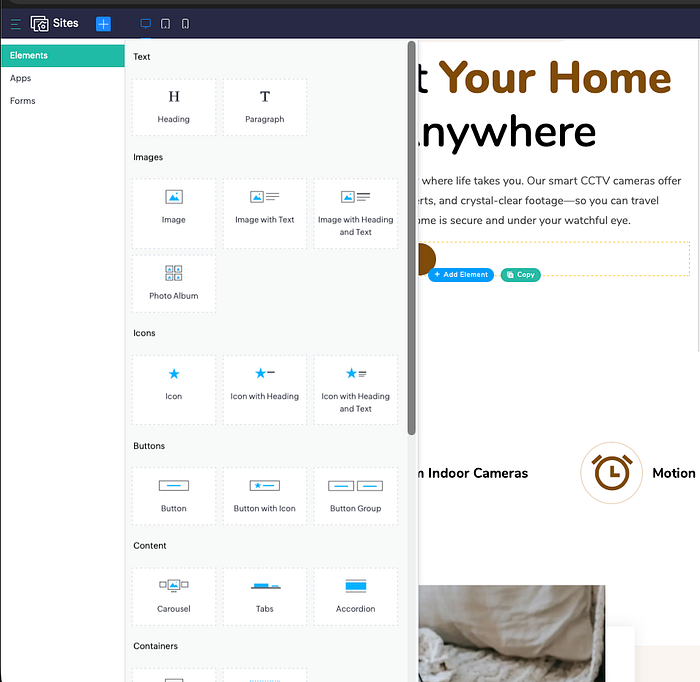
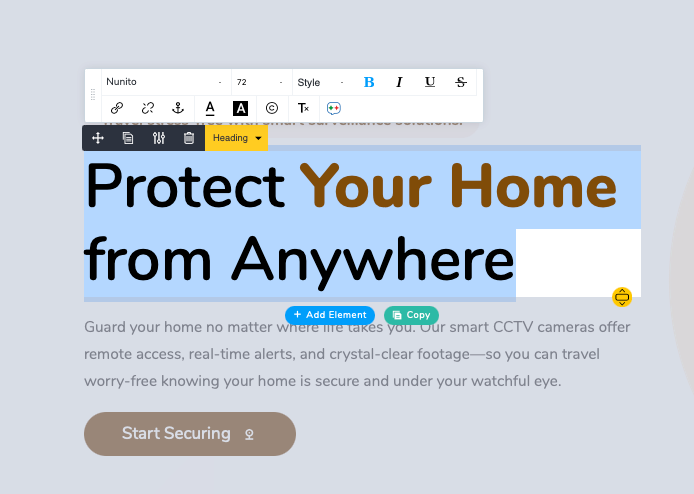
How do I edit the text or the image? It’s super easy! Everything uses a drag-and-drop system. Want to change the text? Just double-click on it and start typing. Want to change an image or add a video? Simply delete the old element, click the “Add Element” icon on the left sidebar, select the content type, and drag it to the desired part of the page.
For those of you who understand programming languages, Zoho Sites also doesn’t limit your creativity. Via the “Manage” menu, you can enter additional HTML, CSS or Javascript code using the “Add a Snippet” option. Oh yes, if you accidentally delete something, don’t panic because there is a Trash feature to restore the deleted elements.
Make sure it looks great on mobile.
In fact, most website visitors now use smartphones. So, make sure your website doesn’t look messy when viewed on a small screen.
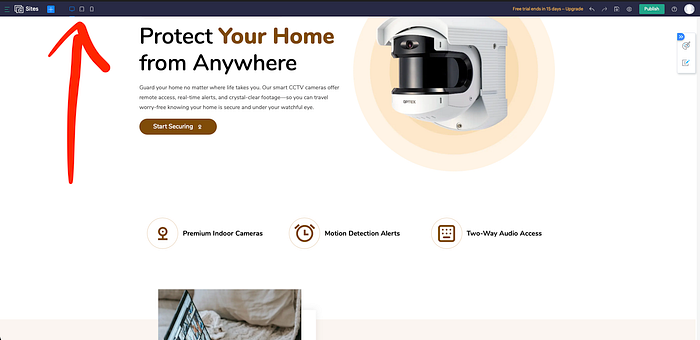
In the top-left corner of the Visual Editor, you’ll find three screen icons (Desktop, Tablet, and Mobile). Click the mobile icon to view the preview (Mobile-First Indexing). The Zoho system automatically adjusts the layout to fit mobile screens, but it is still recommended that you tweak the font size or margins to ensure optimal readability.
Publish and Connect to Your Domain
Happy with the design? Don’t forget to click “Save.” To be absolutely sure, click the magnifying glass icon (“Preview”) to test how your website feels when live in a browser (like Chrome or Safari). Check for any overlapping text or buttons that don’t work.
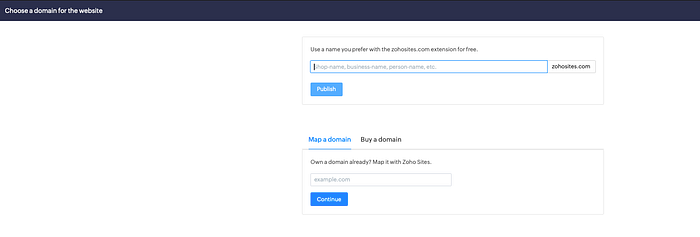
Once everything is perfect, it’s time! Click the “Publish” button in the top right corner. At this stage, you’ll need a link address (domain) for your website. There are three options you can choose from:
- Use a free subdomain
Suitable for the initial testing phase. Your address will include a Zoho suffix, for example, kulkul.zohosites.in. - Connect to Your Own Domain (Map Existing Domain)
If you have already purchased a domain elsewhere (such as .com or .id), you simply need to point its DNS or A-Record to the Zoho server. - Buy a New Domain
You can search for and purchase your desired domain name directly from the Zoho dashboard. You can also choose to keep your personal data private (Whois Privacy) to avoid being spammed by pranksters.
The good news is that once your website is connected to a domain, Zoho Sites automatically installs an SSL (HTTPS) certificate. This ensures a secure connection, indicated by the padlock icon in the browser, so visitor data is protected against easy leaks.
Conclusion
Creating your dream website isn’t as hard as it used to be. You don’t need to stress over lines of code that give you a headache.
From selecting a beautiful template, customizing colors, and adding blog features to securing your site against hacking, you can do it all in one place using Zoho Sites’ drag-and-drop functionality. Whether you are a freelancer, a business owner, or an agency, you can now create a professional-grade website quickly and easily. Happy exploring and creating!